MUlliNER.ORG/NET/DE
- Home
- Personal
- Imprint/Disclaimer
- contact me
- Bluetooth
- PalmOS
- J2ME
- PocketPC
- NFC
- Symbian OS
- iPhone
- Android
- Maemo
- Security Research
| July 2025 | ||||||
|---|---|---|---|---|---|---|
| Sun | Mon | Tue | Wed | Thu | Fri | Sat |
| 1 | 2 | 3 | 4 | 5 | ||
| 6 | 7 | 8 | 9 | 10 | 11 | 12 |
| 13 | 14 | 15 | 16 | 17 | 18 | 19 |
| 20 | 21 | 22 | 23 | 24 | 25 | 26 |
| 27 | 28 | 29 | 30 | 31 | ||
Categories
- android(1)
- apple(1)
- argl(15)
- bluetooth(4)
- deutschland(6)
- events(25)
- fun(52)
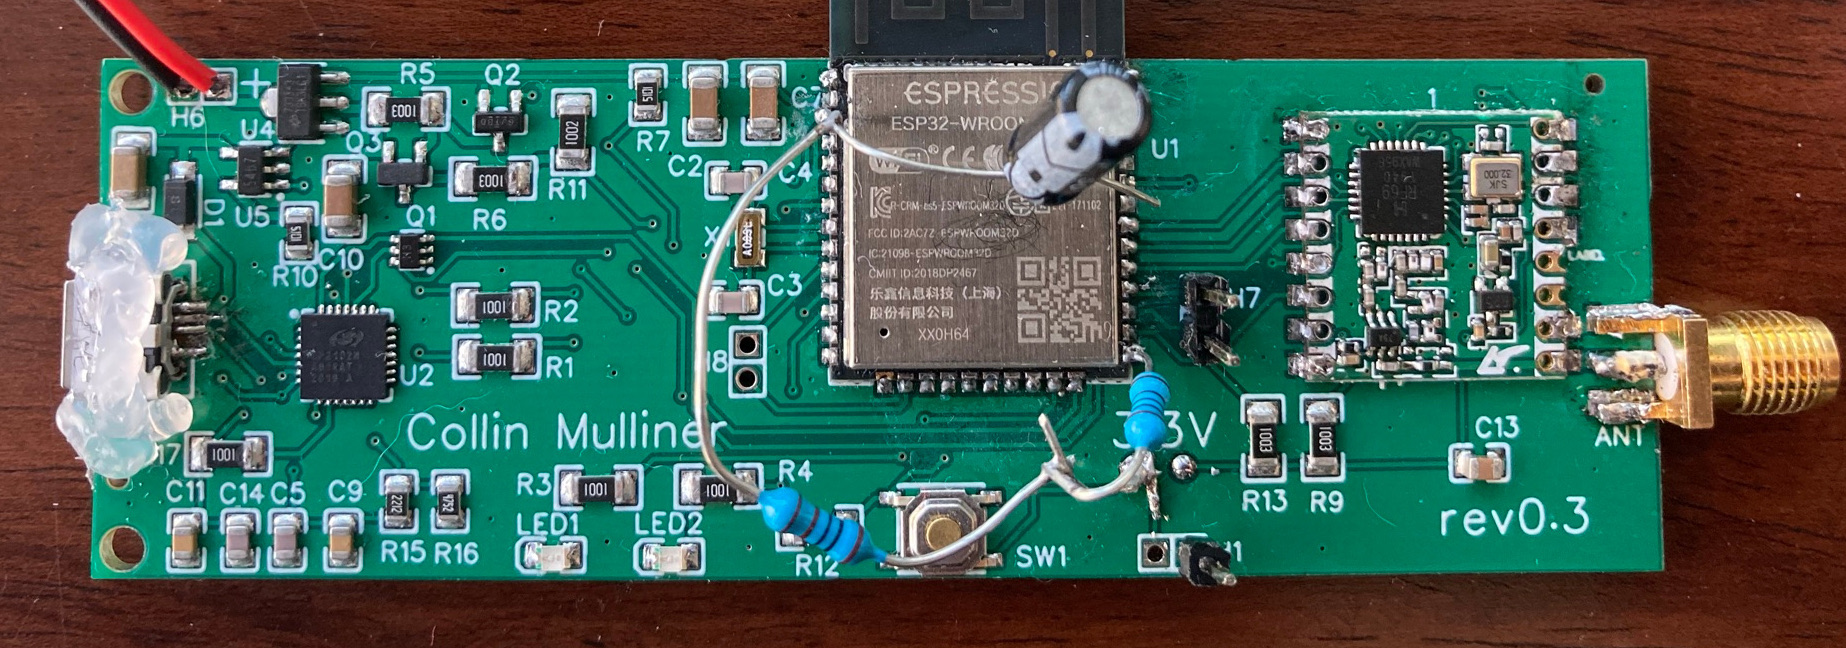
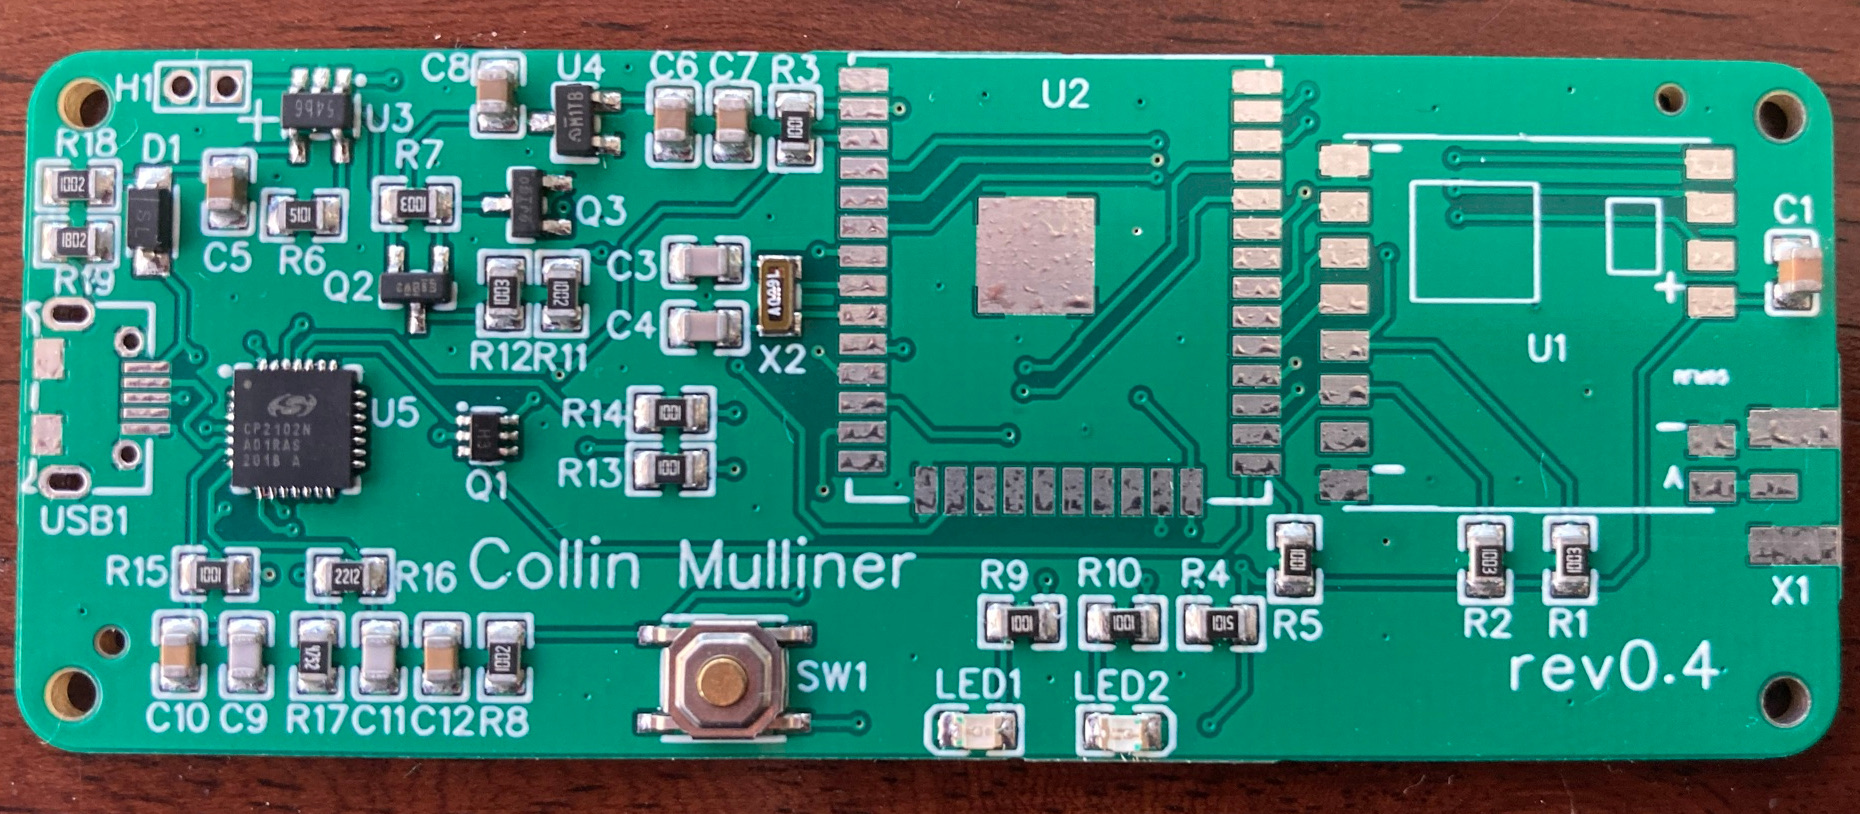
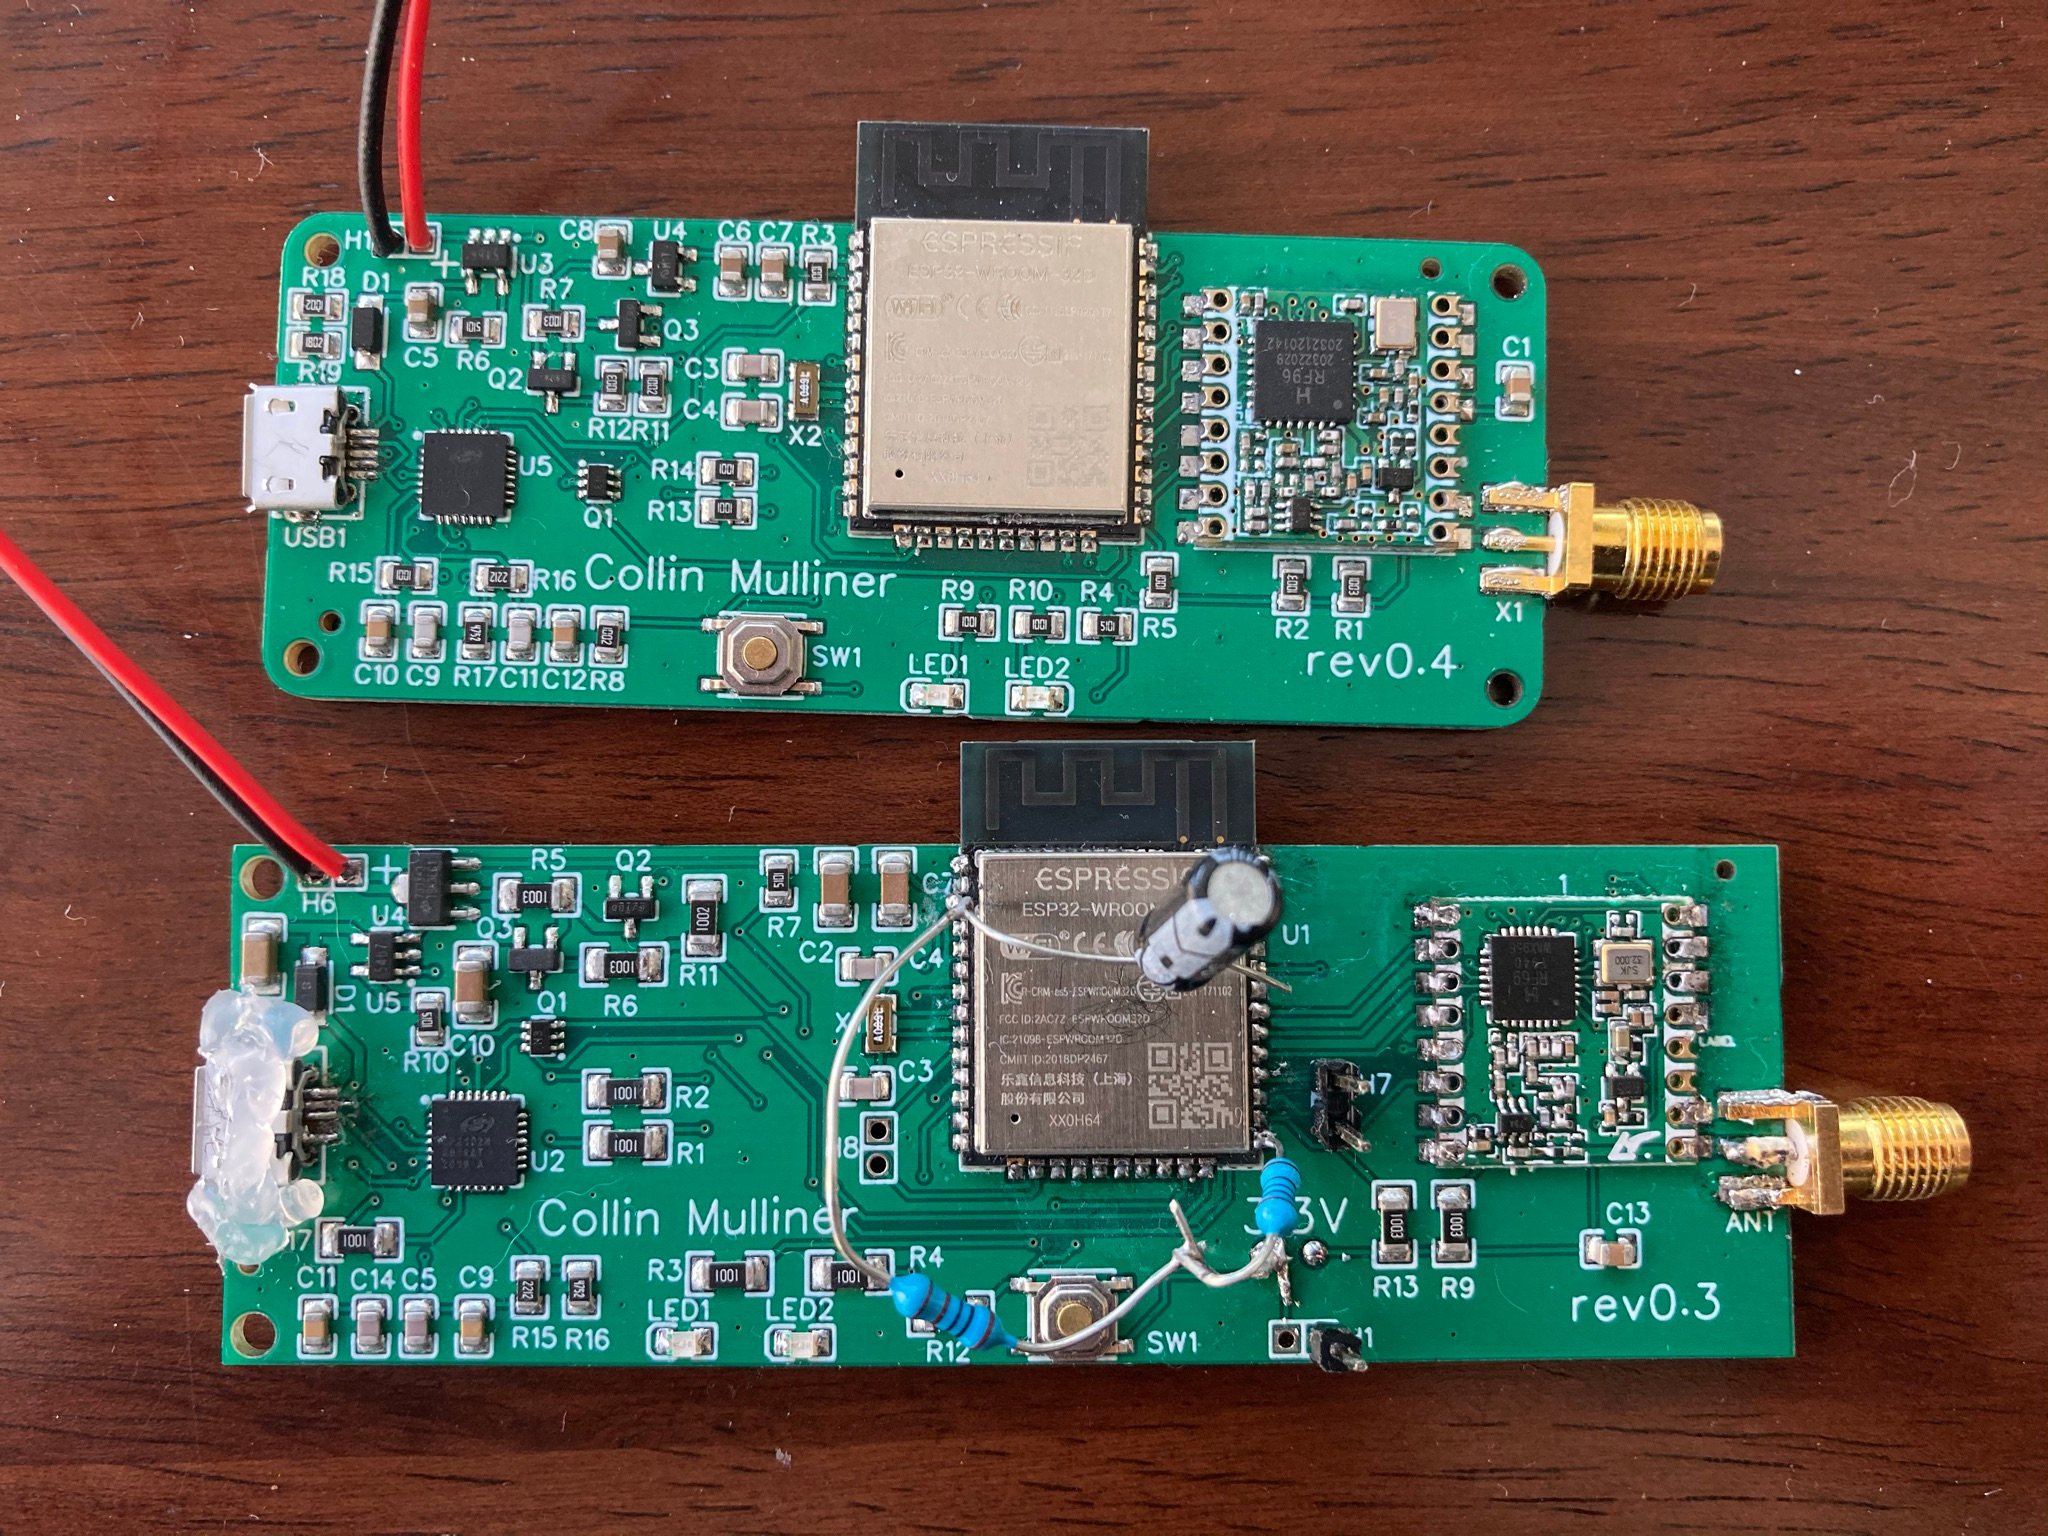
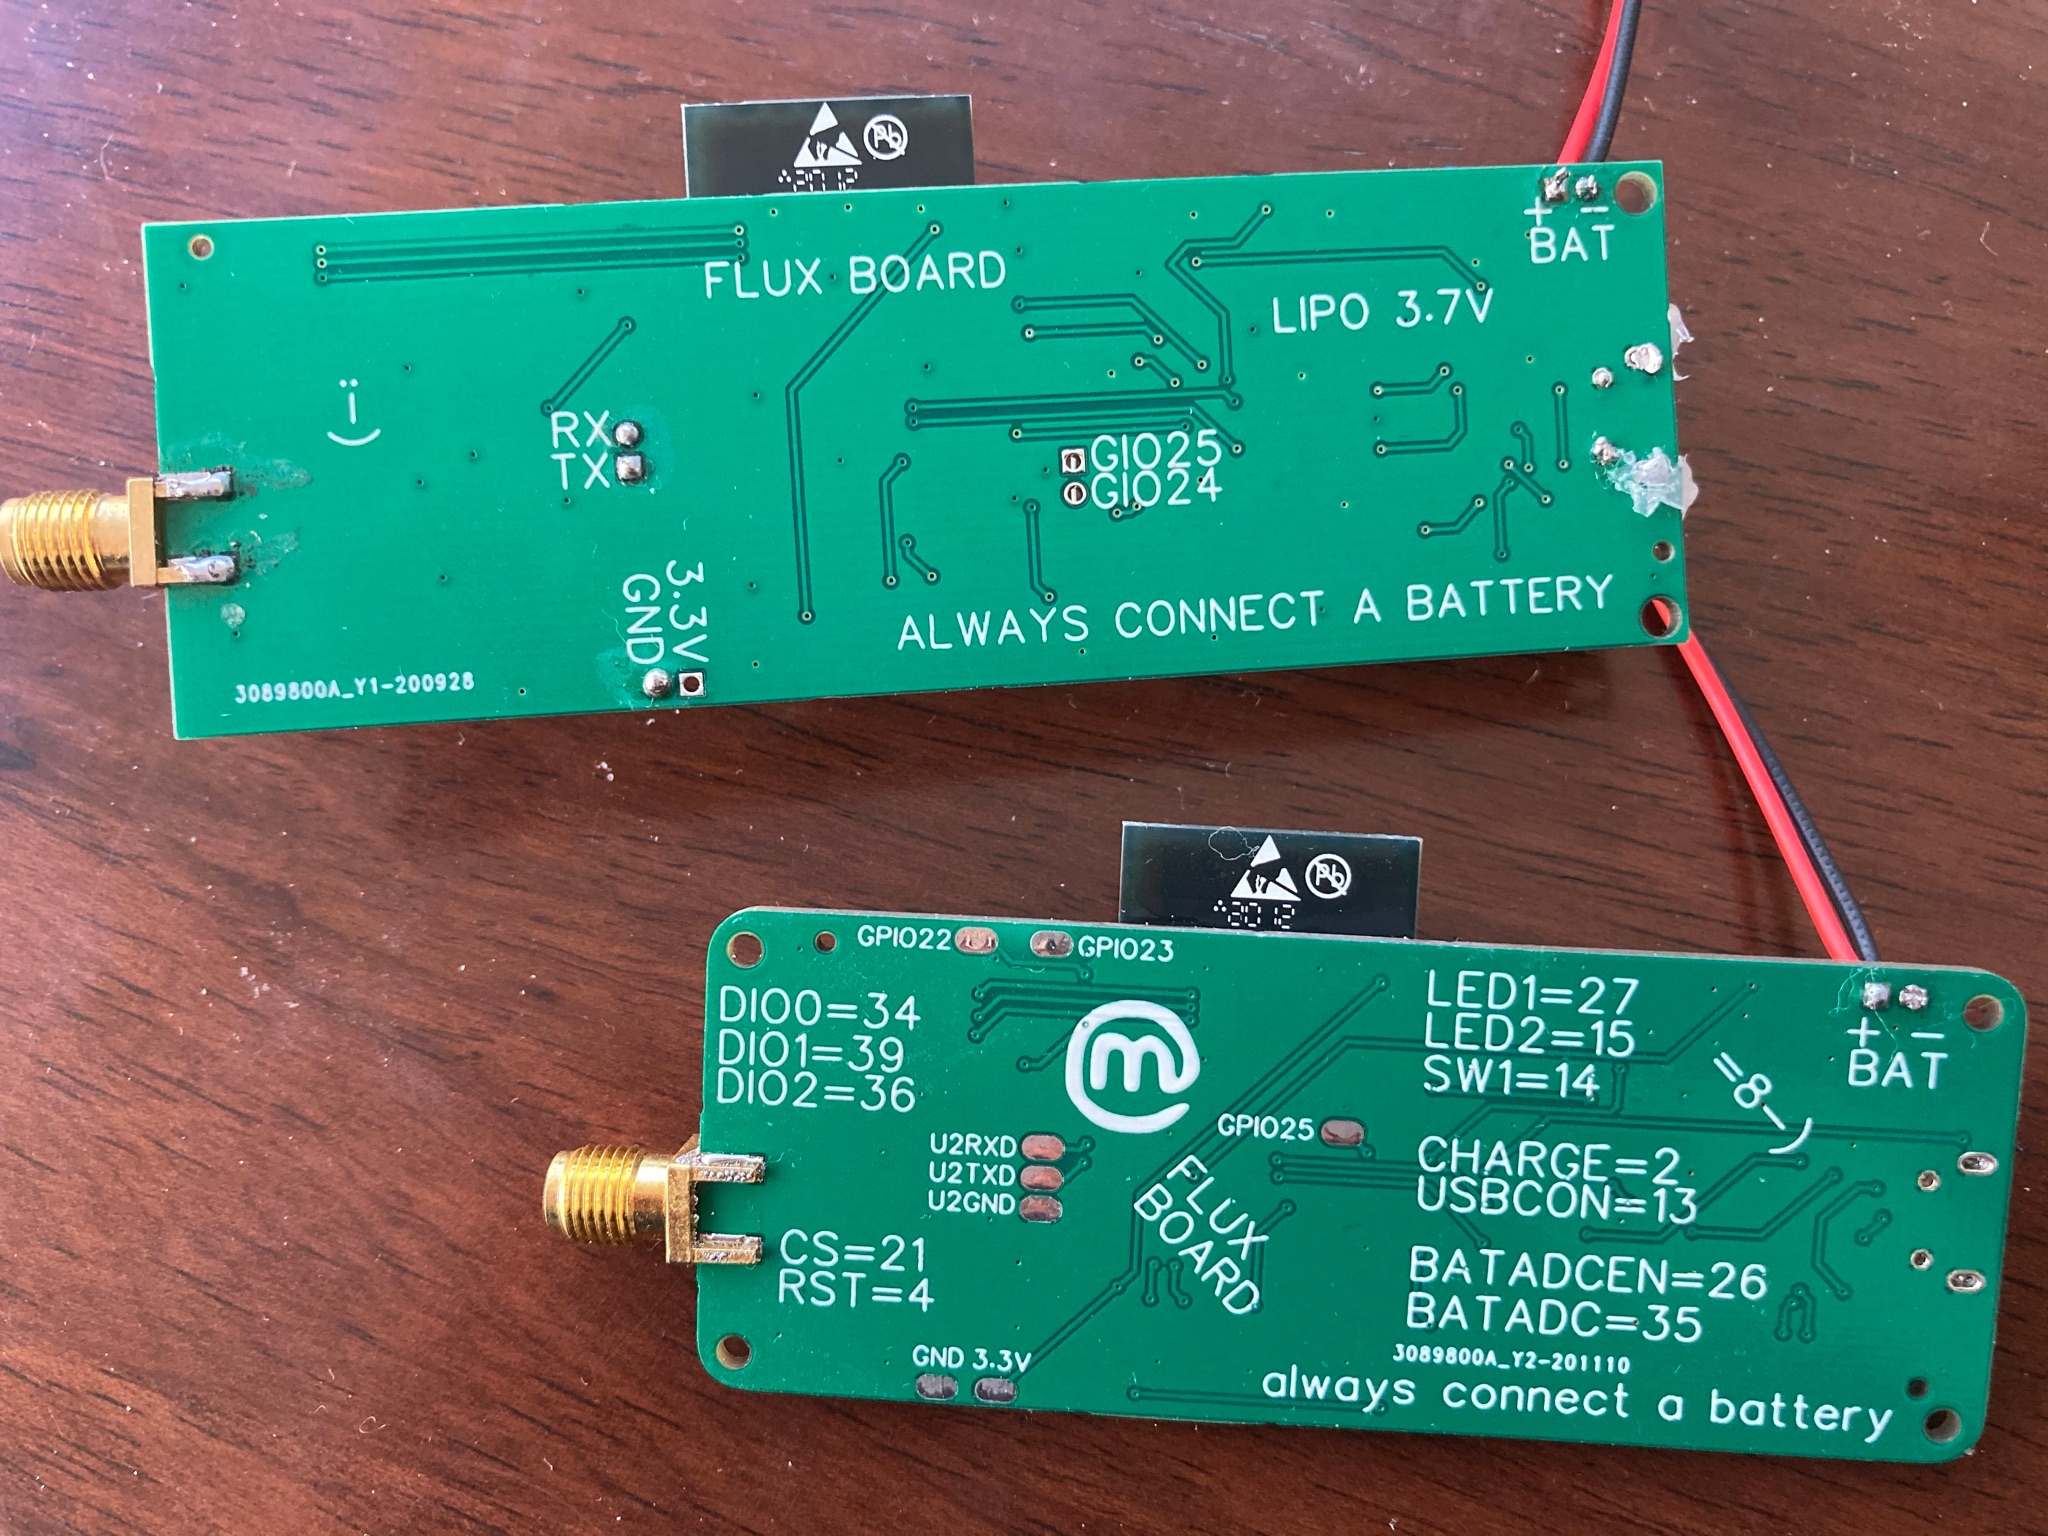
- hardware(32)
- hehe(2)
- j2me(2)
- lora(2)
- main(11)
- misc(14)
- mobile(2)
- mobile_computing(33)
- n770(53)
- nfc(6)
- palmos(4)
- phones(17)
- pocketpc(13)
- projects(10)
- security(204)
- software(23)
- voip(1)
- web20(1)
- web_links(13)
- windows(3)
- wireless(3)
- writing(1)
Blogs
Archive
- February 2021 (2)
- August 2019 (1)
- January 2019 (1)
- November 2018 (1)
- June 2018 (1)
- April 2018 (1)
- January 2018 (1)
- October 2017 (1)
- September 2017 (2)
- August 2017 (2)
- July 2017 (1)
- June 2017 (1)
- May 2017 (1)
- April 2017 (1)
- March 2017 (2)
- February 2017 (1)
- January 2017 (1)
- December 2016 (2)
- November 2016 (2)
- October 2016 (1)
- September 2016 (1)
- August 2016 (1)
- July 2016 (1)
- June 2016 (1)
- May 2016 (1)
- March 2016 (1)
- February 2016 (2)
- January 2016 (1)
- December 2015 (1)
- November 2015 (1)
- October 2015 (2)
- September 2015 (1)
- August 2015 (1)
- July 2015 (1)
- June 2015 (2)
- May 2015 (3)
- March 2015 (4)
- February 2015 (2)
- January 2015 (2)
- December 2014 (1)
- November 2014 (1)
- October 2014 (2)
- August 2014 (1)
- July 2014 (1)
- June 2014 (1)
- May 2014 (1)
- April 2014 (2)
- March 2014 (2)
- January 2014 (2)
- November 2013 (1)
- October 2013 (1)
- August 2013 (2)
- July 2013 (1)
- June 2013 (2)
- May 2013 (2)
- April 2013 (1)
- March 2013 (2)
- January 2013 (2)
- December 2012 (1)
- November 2012 (2)
- October 2012 (1)
- September 2012 (2)
- August 2012 (3)
- June 2012 (2)
- May 2012 (2)
- April 2012 (1)
- February 2012 (2)
- January 2012 (2)
- December 2011 (2)
- November 2011 (2)
- August 2011 (1)
- July 2011 (3)
- June 2011 (3)
- May 2011 (1)
- April 2011 (3)
- March 2011 (4)
- February 2011 (3)
- January 2011 (4)
- December 2010 (4)
- November 2010 (1)
- October 2010 (3)
- September 2010 (6)
- August 2010 (5)
- July 2010 (2)
- June 2010 (3)
- May 2010 (3)
- April 2010 (3)
- March 2010 (2)
- February 2010 (3)
- January 2010 (1)
- December 2009 (4)
- November 2009 (1)
- October 2009 (3)
- September 2009 (4)
- August 2009 (5)
- July 2009 (3)
- June 2009 (2)
- May 2009 (1)
- April 2009 (4)
- March 2009 (4)
- February 2009 (3)
- January 2009 (11)
- December 2008 (9)
- November 2008 (7)
- October 2008 (7)
- September 2008 (9)
- August 2008 (7)
- July 2008 (6)
- June 2008 (8)
- May 2008 (4)
- April 2008 (4)
- March 2008 (11)
- February 2008 (5)
- January 2008 (11)
- December 2007 (4)
- November 2007 (3)
- October 2007 (8)
- September 2007 (5)
- August 2007 (9)
- July 2007 (7)
- June 2007 (4)
- May 2007 (4)
- April 2007 (3)
- March 2007 (3)
- February 2007 (5)
- January 2007 (13)
- December 2006 (11)
- November 2006 (3)
- October 2006 (5)
- September 2006 (2)
- August 2006 (9)
- July 2006 (4)
- June 2006 (7)
- May 2006 (14)
- April 2006 (2)
- March 2006 (14)
- February 2006 (9)
- January 2006 (10)
- December 2005 (15)
- November 2005 (15)
- October 2005 (7)
- September 2005 (6)
- August 2005 (11)
- July 2005 (9)
- June 2005 (2)
- May 2005 (3)
- April 2005 (5)
- March 2005 (4)
- February 2005 (2)
- January 2005 (7)
- December 2004 (5)
- November 2004 (6)
- October 2004 (5)
RSS
-
ALL
android
apple
argl
bluetooth
deutschland
events
fun
hardware
hehe
j2me
lora
main
misc
mobile
mobile_computing
n770
nfc
palmos
phones
pocketpc
projects
security
software
voip
web20
web_links
windows
wireless
writing